


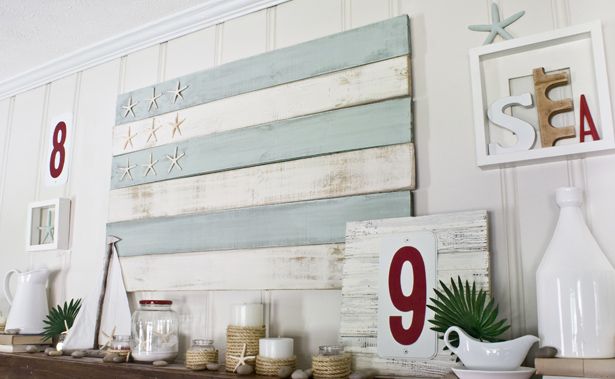
If you wondered how we made the wooden flag in our "Summer Mantel" post, today's post is for YOU!

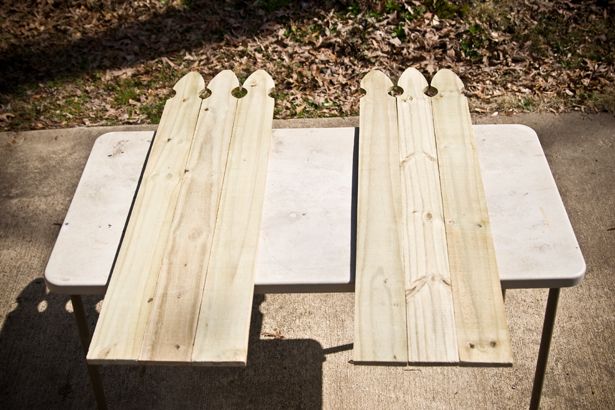
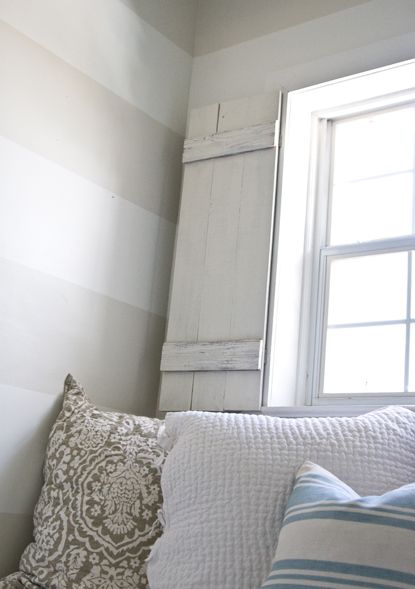
A while back, we made some shutters out of inexpensive wood pickets from Lowes...
But we didn't end up liking the way they looked when we mounted them to the window in the Reading Room...
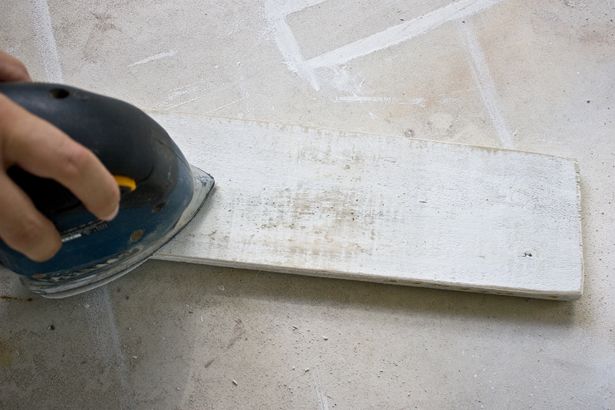
So the other day, we took them apart, and I gave the edges of the white-painted planks a good distressin'...
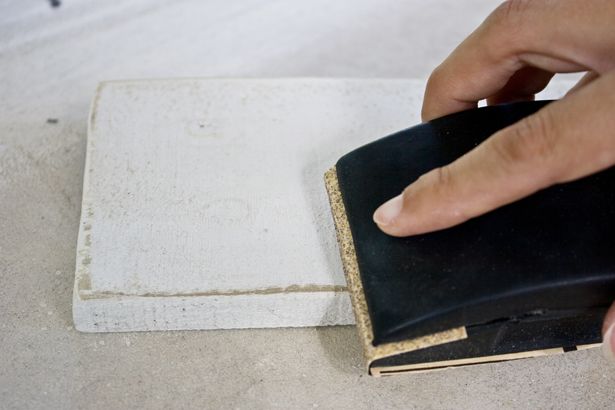
I also sanded off the glue from the parts where the little, old beadboard planks used to be...

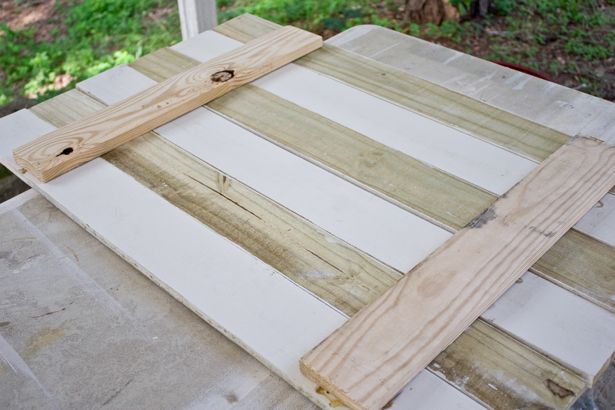
Next, we laid the boards out on our work table- some facing up, some facing down...

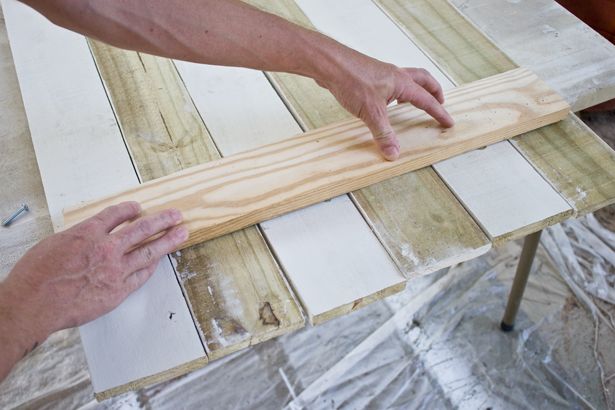
Then we cut a couple of pieces of scrap wood to hold all our of "stripes" together...
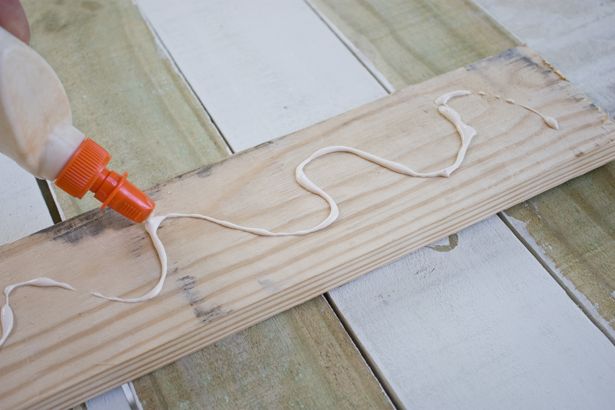
At first, we thought wood glue would do the trick...
So we flipped the scrap wood over, and pressed it into place...
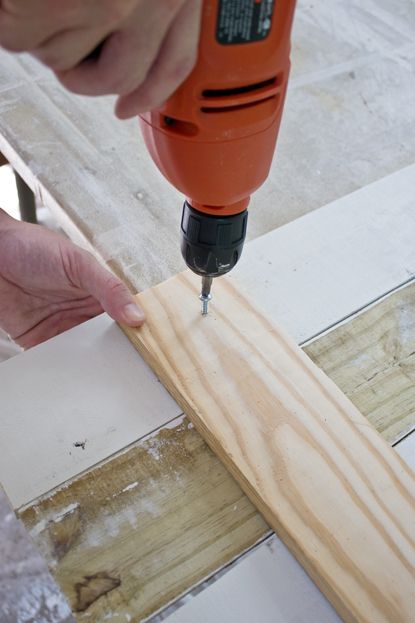
And to add a little extra support, we thought we'd drive a screw into the top and bottom of each piece of scrap wood...
That's when it occurred to us that we might want to use Liquid Nails for a stronger bond instead...
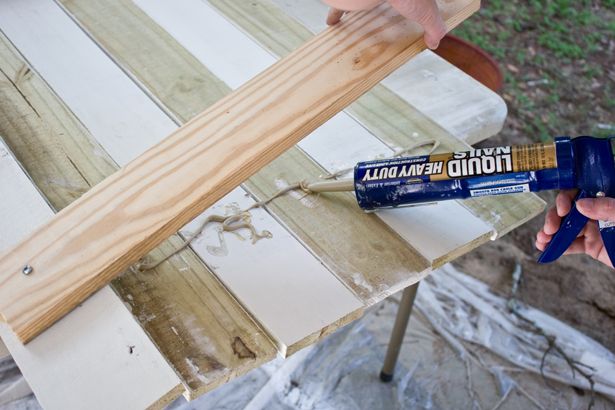
Oops.

Once the Liquid Nails was dry, we flipped our flag over and started to paint.
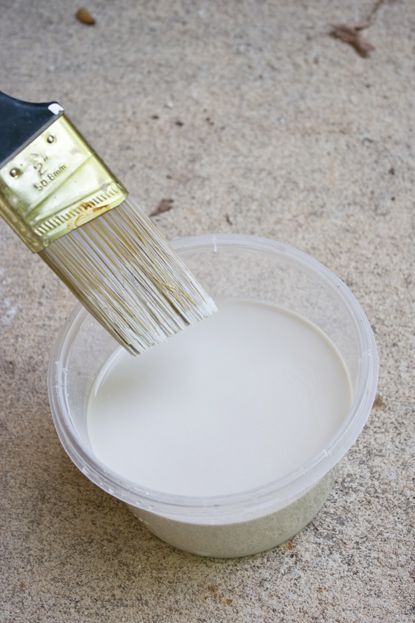
Originally, I wanted the darker stripes to look like driftwood, so I used some "Mourning Dove" gray paint (Martha Stewart by Sherwin Williams), a small bowl of water, and a 2-1/2" wide paintbrush...
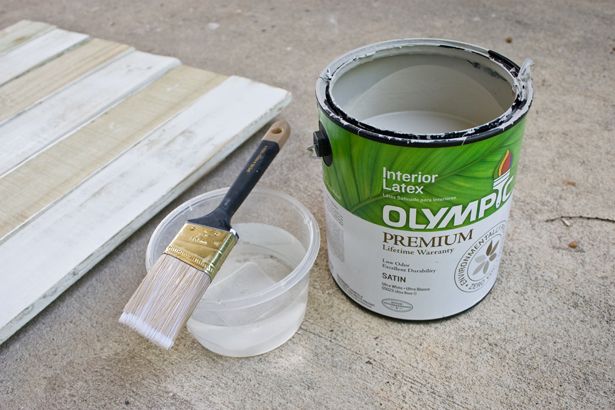
I filled the bowl about 3/4 full of water...
Then Kev dipped the paintbrush down into the paint...
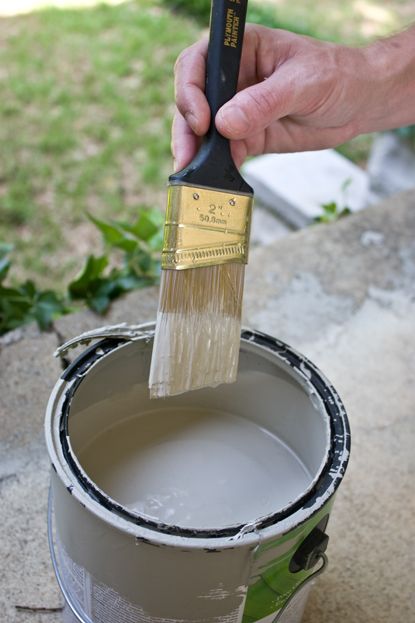
At this point, don't wipe any of the paint off the brush (like you would normally do before you paint something...unless, of course, you're a reeeeallly sloppy painter.)
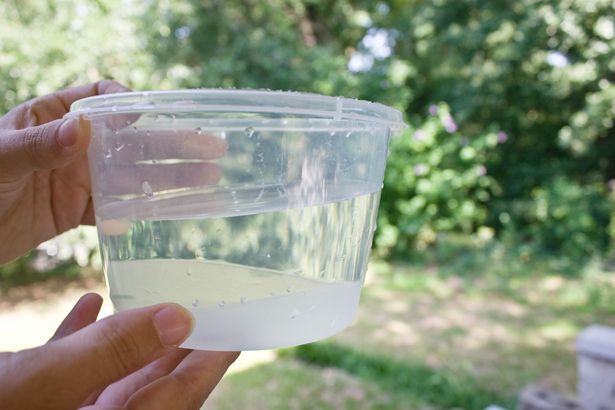
Just put it directly into the water...
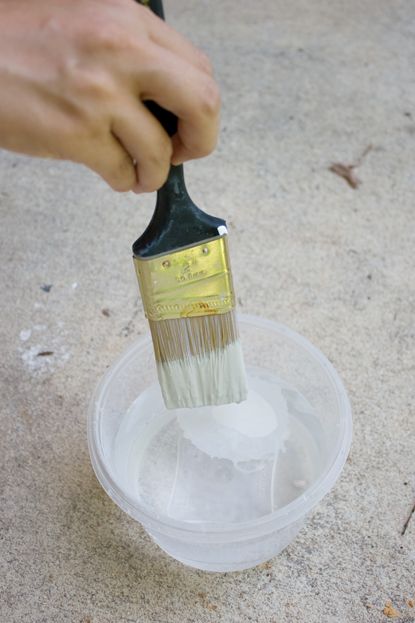
And stir it around until the water looks like this...
Then begin applying your "paint/water mix" to the unfinished wood stripes...
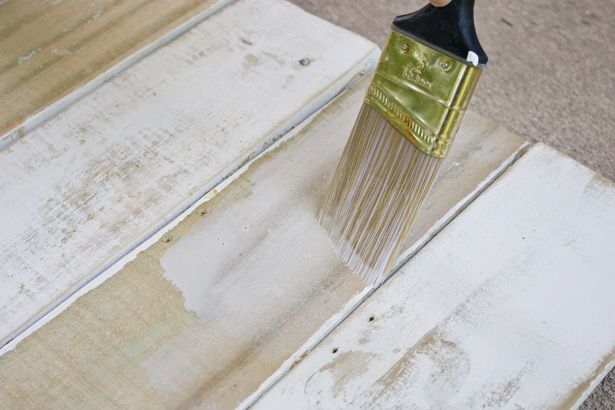
A lot of it will soak into the wood, so feel free to dip your paintbrush back into the can of paint a little bit here and there as you go- just make sure to apply it to the saturated boards with a very light touch.
Also, you may want to let each stripe completely dry, and then check them out to see if you want to do another layer of paint/water or not. I actually ended up doing three by the time all was said and done.
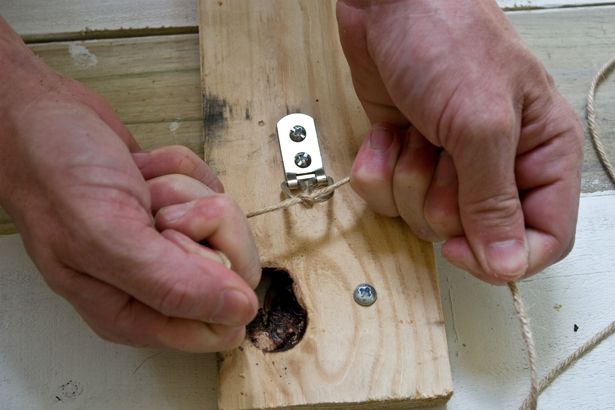
When you've got the boards lookin' the way you want 'em to look- you can attach picture hanging hardware. Measure down from the top of the flag to make sure you attach them both at the same level...
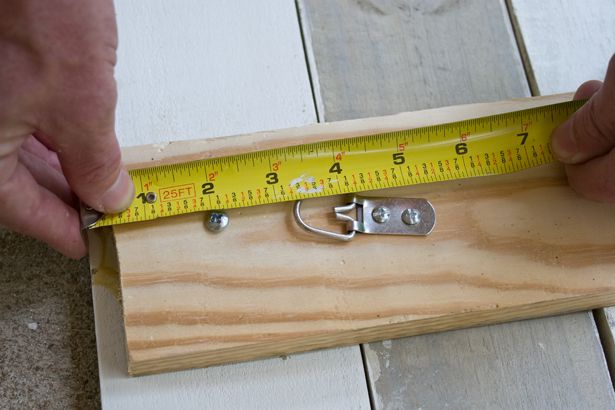
Then screw them into place...

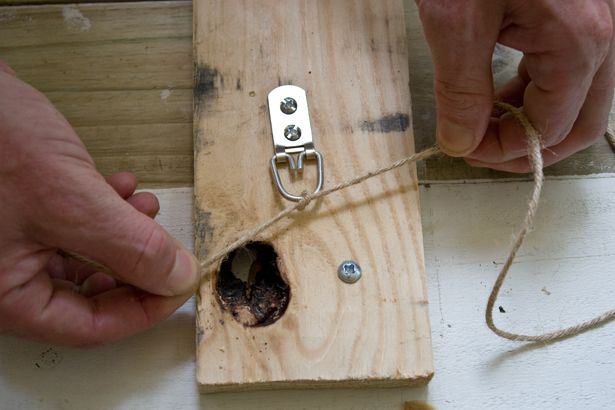
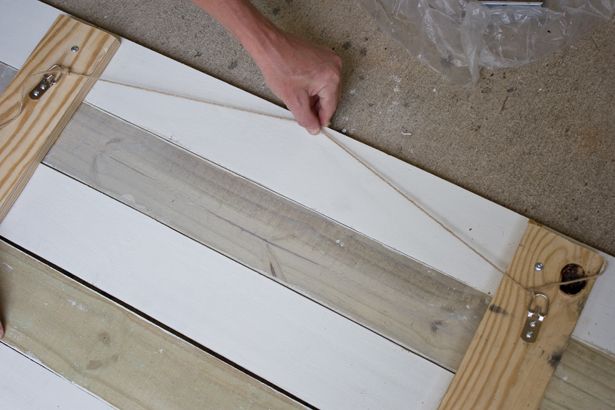
And I don't know about you, but we always struggle to hang things straight if we just use those picture hanger things (even with a laser level), so we used some jute twine between the two hangers...
This next photo shows Mr. Palmer's reaction to Mrs. Palmer's suggestion that he "make sure it's tied reeeeally tight."
Can you say "white-knuckled"?
If you decide to go the "jute route", remember to make sure your string doesn't show above your flag once it's pulled tight (like it would be if it were hanging on a nail)...
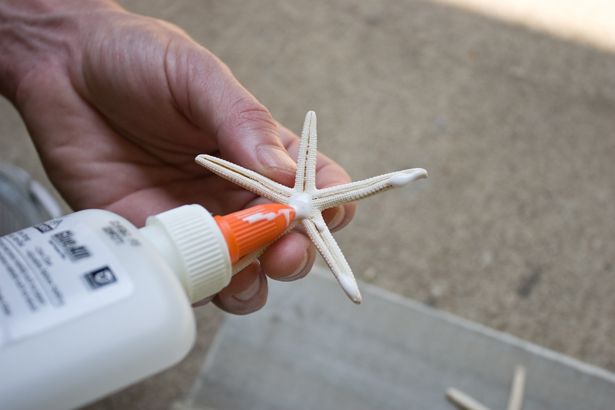
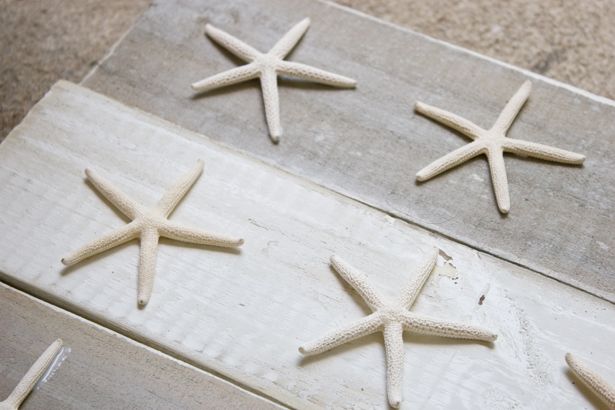
The last step involved gluing on the little starfish I got on eBay...
Make sure you use a glue that dries clear...
Well...actually the last step involved brushing on some aqua-blue colored paint I mixed together from a few, old paint samples I had laying around the house...
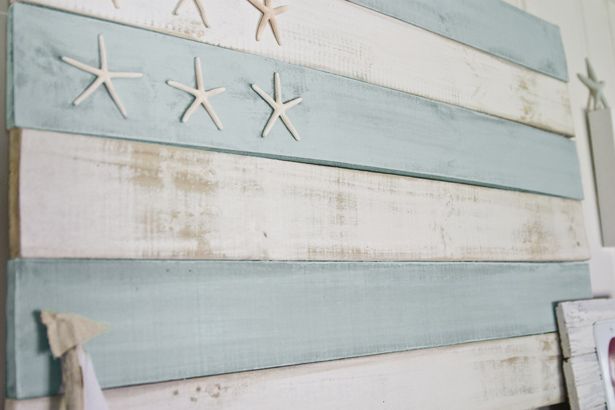
The gray was beautiful, but once we got it in the house and up on the wall, it just screamed- "paint me a aqua and I will live happily ever after with all your red stuff!"
So I did.

PS-
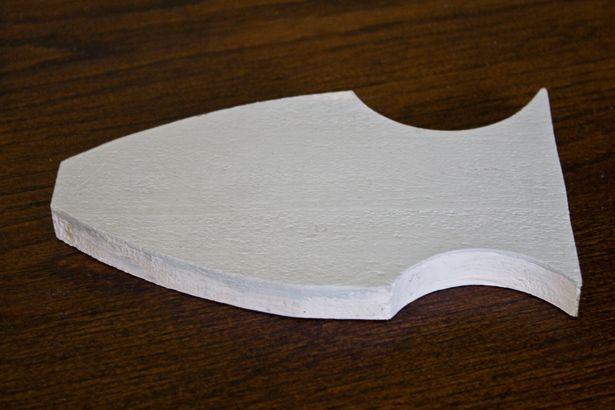
If you don't like wasting wood- the picket heads make great little "fish" too!
PPS-
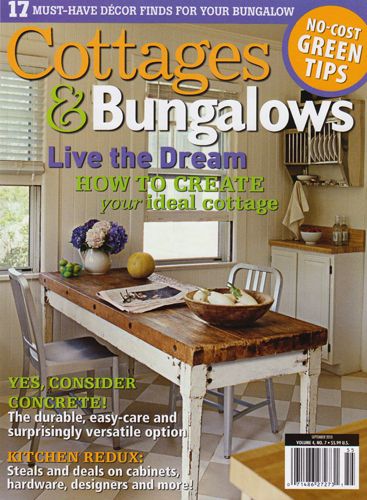
If you happen to find yourself in a bookstore in the near future, check out the latest issue of Cottages & Bungalows magazine. There's an article about our house on pages 40-51. It includes a bunch of new photos of our place, and we're giddy as schoolkids about it, not only because they put together such a sweet article, but because they let us shoot all the photos!
It's our first, real photo credit! Such a trip!
-------------------------------------------------------------------------------------
Want sneak peeks of our projects before we blog about them?
Visit us on Facebook!

-------------------------------------------------------------------------------------
Need help arranging your furniture?
Need design help?
Check out my e-book!


42 comments:
Sweet! Creating is just sooo satisfying, is it not?? xo
oh, honeybird, i love that flag in it's aqua shade!!! genius for using starfish on the flag!
and congrats on the magazine credits!
i think the reason why i keep failing to create in the same awesome way that you do is that i spend quite a bit of time doing this: http://ht.ly/2hAcE
but i have dreams of being productive like you!
you are an inspiration!
angie
Thanks for the tutorial. It looks great and like the change you made to make it aqua.
I'm going to go out and get that magazine tomorrow. It's on my list along with Veranda. :)
Oh Layla, it looks great! You and Kevin did a great job and love the colors and the stars just complete it. Great job!
Layla, I LOVE this! That mantle is to die for and that flag is beyond fabulous!!
Layla - what a gorgeous idea! Love love the mixture of red, white and blue yet in a beachy summer setting. Absolute genius. Just blogged your praises here: http://bellsandkilts.blogspot.com/2010/07/beachy-keen.html
And I will look for the magazine - that's so awesome! I wrote a travel story recently and it was published along with some of my own pictures. Gotta love that. (Read it here: http://bellsandkilts.blogspot.com/2010/07/phantom-faces.html)
Love this, Layla! I saw your feature in Cottages & Bungalows when I was in the store waiting for a prescription. It was a beautiful article and still took my breath away, even though I'd seen many of the pictures before on your blog. It just reminded me of you & Kevin's amazing-ness. :)
Layla and Kevin, I basically love y'all :) I think everything you touch is beautiful! I grew up in south GA and south AL and love hearing you "talk" about it. I'm in VA now and look forward to your posts...about home, God, goodness...everything. Thank you!
this may very well be my favorite thing that you have done, on a small scale. I am not much for patriotic decor (like the USA, just not a whole lot of red, white, and blue) but this is perfect!
xoxo!
Michelle
Love the flag and appreciate the detailed tutorial! Really enjoying all the fabulous inspiration!!!
Gorgeous! I can't wait to make one! Thank you for the inspiration!
Great tutorial! And how exciting to be able to shoot your own photos for the magazine! :-)
LOVE the flag! I saw that magazine last night at Target and to my surprise, there was your place! I bought it and read the article. I love the pics you did! Congrats!
LOVE this flag!!
YAY! I've been waiting for this tutorial! I'm wanting to make it for my kid's bedroom. Thanks so much for sharing :)
LOVE your blog!
I LOVE this. So adorable. Thanks for the tutorial!
http://www.hillaryblack.com/id22.html
I went to the above link and gave the cust. service rep the subscription pricing advertised there. Apparently it's way cheaper than the current pricing on the actual Cottages & Bungalows website. I was so glad they honored the lower price. So I got 2 year subscription for $32.95 instead of having to pay $29.99 for just 1 year!
Thanks Layla for letting us know about your spread in this magazine. Can't wait to see you and your work in many more magazine in the future!
Beyond adorable. I'm stashing this idea away in my "will do one day" file. :)
Great tutorial! I especially like the bonus of creating a school of fish.
Thomas is picking up a copy of Cottages & Bungalows on his way home from the office today. Congrats on having your beautiful photos of The Lettered Cottage on their pages!
Your Friend,
Deborah
Looks great and doable for me! Thanks for the turorial.
As soon as I heard your cottage was featured, I ran out and bought the magazine. Wonderful!!
Yayyyy! I've been waiting patiently for this tutorial ever since your summer mantle post. Thanks so much! I cant wait to make my own!
i LOVE the idea of using the picket heads as fish! too cute and creative!
HOLY COW! I just came over to your place from Emily of Jones Design Company. (you were on her blogroll)
Your home is lovely, I love the flag, and you are giving me some serious motivation to get my house looking the way I want it! Stunning home, just stunning!
Such a great piece. I just love making art, just got finished making my kitchen "EGGS" one. So much fun!
http://mommarhyne.blogspot.com
congrats on cottages and bungalows!!! i was just in the last issue and am still on cloud 9!!!
Awesome Opossum! Love it!!
I love you for posting this tutorial.
It is precious Layla!
thanks for the tutorial :)
I never get hanging things straight, why haven't I ever thought to use string?!
Cool beans about the 'zine!
Thanks for the tip on finding starfish on ebay! Never would have thought! I love the tutorial and your flag looks great. love that you reused wood from the shutters!
Wow! Awesome tutorial and congrats on the mag spread!
Absolutely LOVE this!!!
Love this idea! You guys are so smart! You did a great job on the tutorial. Congratulations on the magazine, I can't wait to get one.
Love your take on an American flag. What a fun way to show your patriotic side.
I'd love for you to stop by our blog. We're going to be hosting weekly discussion boards on a a variety of topics and would love to hear you ideas.
www.atmosphereid.wordpress.com
Again, you're amazing!!! Love the mantel and thanks for the tutorial!!!
Layla & Kevin.
Absolutely great!!!
So easy to follow for someone thta hates reading directions. hehe
I also think it was genious hearing your gray stipes screamin.
The aqua is so perfect for the color.
Can't wait to get the magazine. YEA! geri.
Loving this Summer Mantel! Your decorating style is just lovely. TFS.
I love the flag, very clever of you to think of doing a flag theme that isn't red white and blue. And the starfish a a great touch. I am a card designer and I think I will try to do a blue and white themed flag as well. Thanks for the inspiration.
Karen
Love the summer mantel! I've also purchased a copy of Cottages and Bungalows just to see your pictures (never bought it before). I love what you and Kevin do and how you're not afraid to try new things. You have truly inspired me and I have been changing my house here and there so that when I walk in a room, I smile. Thanks and love you guys! Beverly Palmer (yes, I'm a Palmer too)
you make it all looks so easy! looks great.
xo,
cristin
Layla, love the flag. So YOU!!!!
This is going to look fabulous hanging from a tree in my hosta garden. Love it!!! I used to do custom framing for the public and a lot of people would use the string or wire between the mirror hangers because they had problems leveling. My tip: put toothpaste on the hangers where the nails would go before you 'test' it on the wall, then push it onto the wall. Drive your nails/screws where the toothpaste is left on the wall...level every time :)
Again, thanks for this great idea...love your stuff!
Post a Comment