Tuesday, March 31, 2009

Flea Market Find- Linen Press?

A few weeks back, while stolling through one of my favorite flea markets, I came upon this solid wood storage unit...

It was love at first sight.


Poor Kevin didn't stand a chance of talking me out of getting it. Fortunately, I only had to twist his arm for about 16 seconds before he, too, realized that it needed to come home with us.

The tag on it read, "Antique Linen Press- $79.99".
(which meant it would actually cost us $86.78 after tax)

So, of course, I asked if I could purchase it for a lower price than it was marked for, and the woman who owns the flea market obliged. (Bless her heart!) I'm happy to say, that it made it's way into the bed of our pickup truck for $71.99. (which was the price including tax)

Since then, I've done some searching online, and I don't think it's actually a "Linen Press" (gosh, do I love to call it that though!) and I don't think it's actually an "Antique" either. (The "Made in China" sticker on the bottom kinda gave it away) :-)

It sort of resembles a changing table, but I think it's too low to actually be one. It measures just 28" tall.

I adore the groupings of little worm holes sprinkled in various places...


...there are even some on the handles of the pull-out baskets...


Even more amazing, ALL of the baskets are in perfect condition (Pretty remarkable, considering the age of this piece. Ha ha) :-)

I sanded it down within minutes of unloading it onto the back patio...

And now it is covered in a smooth & satiny, creamy-white coat...


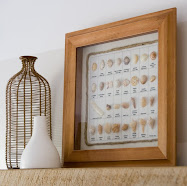
I made sure not to coat the piece too thickly. I put on several thin layers, so that the worm holes stayed free of paint. By the way, very old furniture sometimes has worm holes. To achieve the effect of worm holes, like they have on this piece, a nail is heated and then hammered into the wood. It creates tiny darkened holes that mimic the pattern made by worms. This is usually done around knot holes in wood to look more natural. Here's an example:


Classic Furniture PA


Here are some of mine...


Once the paint had thoroughly dried, I lightly distressed the entire piece, to give it some time-worn, cottage character...


It's now sitting underneath my Dining Room window, ready to be filled with linen napkins, extra silverware, placemats, napkin rings, tablescape props and floral foam.

I'm looking so forward to the challenge of accessorizing the top of it.
I know I want a lamp on it for sure.

Hey! Speaking of lamps, I saw this "borrowed & blue" beauty online the other day for $385...


Cottage Home Maine

It probably wouldn't be too difficult to re-create. You'd need a wicker-covered jug...

Photo: Vintage Weave

I see them at flea markets and on Ebay all the time. They're usually priced between $20-$30.

Then you could dry-brush it any color you like (or leave it natural), and purchase a simple lamp-making kit, available at most home improvement stores. Stick a shade on top, and a round of wood on the bottom, and voila! A whole lotta bang, for not a whole lotta bucks! Pottery Barn is selling these lovely specimens for $149.99-$199.99 right now...


I LOVE them. :-)

Well, that's all for now folks...I wish I could post the fireplace re-do, but Kevin seriously hurt his back the day before yesterday and is having trouble even walking. I really hope he gets to feeling better soon. I hate to see him suffering. :-(

He was halfway done with the fireplace before he hurt his back, and he's so anxious to finish. When he feels better, he'll "git-r-done". It's looking cottagey-delicious already!

Layla

French Plates, Burlap Chalkboard Tags, Photography and a Coffee Sack


Thanks so much to all of those who left comments for my hubby on his Guest Post! Even though it was rainy and dark here this past weekend, I saw sunshine on his face, several times, while he sat in front of his laptop. I knew exactly what he was reading. :-)

It's almost been a year since I started this blog. (mental note: have a giveaway on May 26th)
The wonderful world of blogging has really allowed me to "enjoy the life of my time". So many fantastic people, so many beautiful & interesting blogs.


One of which, is the
Old Painted Cottage. Jennifer and I exchanged goods & services recently, and I couldn't be happier with the sweet little plates that arrived on my front porch today...


I want to use them either in the Kitchen, or the Dining Room...not sure yet. I love having stuff like this to think about....thank you for cultivating my creativity Jennifer. :-)

--------------------------------------------------------------------------------------

I also received these darling little burlap/chalkboard tags from Grace at Coastline:

I used them in the Kitchen, on the baskets that I have in my open cabinets...


Grace (noun) 1. elegance or beauty of form, manner, motion, or action.


Thank you so much for your kindness and generosity Grace- your name, most certainly, defines you.


------------------------------------------------------------------------------------------

I have also been chatting with a woman named Karen, from Georgia, who was kind enough to send me this (and several other) burlap coffee bean sacks...


I can't wait to create things with them! The one in the photo above may end up in my Office as a bulletin board. Of course I wouldn't actually want to clutter it up by pinning anything to it. How could I? Look at the beauty in its color, texture and black, stamped type!


Karen, your gift quickened my pulse, made my heart sing and put sunshine in my step yesterday. Thank you for being the bright & shiny person you are.

--------------------------------------------------------------------------------------

You may have noticed the button on the side of my blog advertising Kelly Ann Studio.

She is a tremendously talented photographer, located here in Alabama.
I recently received this 8x10 print of her work titled, "Heartpages"...


Thank you Kelly Ann. You have created an image that relays a wonderful message. From different perspectives, the view can often look very different. I will be reminded to search for the beauty in everything, every time I look at your "work of heart".

Layla

--------------------------------------------------------------------

Unselfish and noble actions are the most radiant pages in the biography of souls.

~David Thomas

Friday, March 27, 2009

Guest Post by Mr. Lettered Cottage

When we moved in to the Lettered Cottage, we were less than impressed with the height (and finish) of our Kitchen cabinets. After visiting a neighbors house, we learned that with paint, and a few pieces of moulding, we could get the look we wanted.

Meet Kevin.


My husband, and the man behind the magical moulding.

:-)


-----------------------------------------------------------


Hello there!


I'm Kevin, and this is officially my first blog post. Here goes....

Let me start by saying I thoroughly enjoy working on this home.


I am truly inspired by Layla's never-ending passion and ideas. It has been absolutely magical watching this place come to life, and it's so cool to be a part of it.

Alright, let's talk moulding!

This project calls for a lot of miter cuts, which, if your anything like me- means you'll be running back to the hardware store to buy more wood. It can be a little tricky trying to figure out the angles sometimes. There are online tutorials about how to cut crown moulding, but I'm more of a "wing it and pray" kind of guy.

I used this Ryobi compound miter saw. It was the cheapest one in the store, but it always seems to get the job done...


Here are the various pieces of trim, MDF and moulding I purchased...


It's just 1"x6" pre-primed MDF, some 3" crown moulding, and some small, wood decorative trim moulding.


All of the cuts had to be made holding the moulding at an angle. It took me a minute (and a few pieces of moulding) to figure that out!


I tried to nail the crown moulding pieces to my 1"x6" pieces, but after splitting a couple of pieces of crown, I finally decided to just use wood glue. I used painters tape to hold the pieces together, until the wood glue dried. Wood glue is extremely strong and since we don't plan on hanging from the tops of our cabinets, I think it'll work just fine...


Here are the cabinets above the stove before I got started...


...and here is what the cabinet on the left looked like after I attached the first 1"x6"s, and the first piece of crown moulding...

And here it is, all taped in place...


I wish we had a small nail gun. With all these projects, I think it's time to invest in one!


Here is a finished corner...

I used a type of caulk that starts out pink, then turns white when it's dry. Pretty cool!
Caulk can be a real life saver if the corners of the moulding don't meet up perfectly.(Or should I say WHEN the corners of the moulding don't meet up perfectly!) :-)


Here is a photo of the kitchen cabinets with all of the new moulding in place. That was definitely the hard part, now on to the fun stuff!


I used small, decorative wood trim to hide the seam between the cabinet and the 1"x6". The miters are a lot easier to cut on these little guys, because the trim sits flush to the cabinet, it doesn't stick out at a 45 degree angle like the crown does.


Next up on my to-do list was to install an Above-Range Microwave. I put up a piece of wood to mount the top of the microwave to.


I simply secured the shelf to the cabinets on either side with L brackets and screws. Pretty easy...

I had an electrician come over and install a dedicated outlet above the wood shelf for the microwave to plug into. It was a cinch for him to install, and since he was here less than an hour, it didn't cost that much at all...


Oh yeah, that reminds me. I say, don't let the placement of your outlets dictate the placement of your furniture. I used to think the T.V. had to go on whichever wall the cable outlet was on, even if it meant you hated the way your furniture was arranged. For the price of a night out on the town, an outlet can be moved. And all that furniture you worked so hard to get, will finally look right!


Here I am, getting close to the finish line! I added a piece of wood above the microwave to give it some height...


...and added some more of the little decorative trim and this log scale stick Layla picked up at Eastbrook for good measure! :)


I painted everything black, distressed the edges, added a coat of polyurethane and put a cool old wine rack, we got for $4.99, on top. Layla isn't a huge fan of wine racks above microwaves, but I like it, and I'd like it to stay. It even looks cool empty...


There used to be a cabinet hanging where the new microwave is, so I'm going to reuse it by re-hanging it above the refrigerator. Then on the right side of the fridge, there will be another tall, pantry cabinet, like the one on the left side of the fridge. Layla says it will make the fridge look more "built in". I'm down with that.

Layla still needs to add more corbels underneath the upper cabinets I just finished.


But for now, it's 6 o'clock, and I'm going to go see if she wants to kick it on the front porch with me for a bit.

One more thing though, before I sign off. I want to thank you all sooo much for all the kind comments you leave here! It truly means the world to my bride. You have all inspired her more than you will ever know. This blog has changed our lives in such a positive way...and it's because of all of you!!

I had a great time writing this, have an awesome weekend-

Kevin


P.S. We have plans to change out the dishwasher (which is broken), the stove (which is malfunctioning) and the refrigerator with stainless steel ones too.

Wednesday, March 25, 2009

Fireplace Re-Do

I had the pleasure of chatting via email with Donna from the blog "Funky Junk Interiors" . And since Kevin is also redoing our fireplace right now, I thought I'd ask her if I could share her Fireplace re-do here on my blog, and then post ours when Kevin is done. She said yes, so here it is! You're going to LOVE this! :-)


A massive mantle was created out of "precision board". They went for a slightly whimsical feel by using a wire brush on a drill. Hand carving and a router were also used to create the look they were after...


After the carving of the mantle, Donna applied layers of paint and glaze to achieve a wood effect.

Heavy, metal corbels were created to cover the previously brick mantle supports. The massive new brackets bring the scale of the mantle down to the perfect proportion.


Donna didn't care for the square opening in the fireplace, so a curved metal insert was designed. It's removable, so if she wants to switch to gas at a later date, that will be a cinch...


Next, the measuring process for the upper part of the wall began...


The frame-work was created so the rock could be carried up all the way to the ceiling. Donna chose to use cultured stone, but said you could also choose fiberglass, reinforced hand-carved cement. The stone was placed right over top of the existing brick and on the new frame-work above the mantel...


Here's an example of the reinforced concrete Donna mentioned. The base was hand carved with the concrete to achieve the look of one solid rock. The result gives the fireplace more visual weight and is easier to sit on as well. The stone was treated to achieve the same color results as the rest of the rock...


Thanks for sharing your talents with us Donna! You and your fireplace are amazing!

PS...Kevin is working on both the Kitchen cabinets and the Fireplace, simultaneously, right now- but hopes to have the Kitchen Tutorial photos ready for me by Friday! :-)