If you wondered how we made the wooden flag in our "Summer Mantel" post, today's post is for YOU!
A while back, we made some shutters out of inexpensive wood pickets from Lowes...
But we didn't end up liking the way they looked when we mounted them to the window in the Reading Room...
So the other day, we took them apart, and I gave the edges of the white-painted planks a good distressin'...
I also sanded off the glue from the parts where the little, old beadboard planks used to be...
Next, we laid the boards out on our work table- some facing up, some facing down...
Then we cut a couple of pieces of scrap wood to hold all our of "stripes" together...
At first, we thought wood glue would do the trick...
So we flipped the scrap wood over, and pressed it into place...
And to add a little extra support, we thought we'd drive a screw into the top and bottom of each piece of scrap wood...
That's when it occurred to us that we might want to use Liquid Nails for a stronger bond instead...
Oops.
Once the Liquid Nails was dry, we flipped our flag over and started to paint.
Originally, I wanted the darker stripes to look like driftwood, so I used some "Mourning Dove" gray paint (Martha Stewart by Sherwin Williams), a small bowl of water, and a 2-1/2" wide paintbrush...
I filled the bowl about 3/4 full of water...
Then Kev dipped the paintbrush down into the paint...
At this point, don't wipe any of the paint off the brush (like you would normally do before you paint something...unless, of course, you're a reeeeallly sloppy painter.)
Just put it directly into the water...
And stir it around until the water looks like this...
Then begin applying your "paint/water mix" to the unfinished wood stripes...
A lot of it will soak into the wood, so feel free to dip your paintbrush back into the can of paint a little bit here and there as you go- just make sure to apply it to the saturated boards with a very light touch.
Also, you may want to let each stripe completely dry, and then check them out to see if you want to do another layer of paint/water or not. I actually ended up doing three by the time all was said and done.
When you've got the boards lookin' the way you want 'em to look- you can attach picture hanging hardware. Measure down from the top of the flag to make sure you attach them both at the same level...
Then screw them into place...
And I don't know about you, but we always struggle to hang things straight if we just use those picture hanger things (even with a laser level), so we used some jute twine between the two hangers...
This next photo shows Mr. Palmer's reaction to Mrs. Palmer's suggestion that he "make sure it's tied reeeeally tight."
Can you say "white-knuckled"?
If you decide to go the "jute route", remember to make sure your string doesn't show above your flag once it's pulled tight (like it would be if it were hanging on a nail)...
The last step involved gluing on the little starfish I got on eBay...
Make sure you use a glue that dries clear...
Well...actually the last step involved brushing on some aqua-blue colored paint I mixed together from a few, old paint samples I had laying around the house...
The gray was beautiful, but once we got it in the house and up on the wall, it just screamed- "paint me a aqua and I will live happily ever after with all your red stuff!"
So I did.
PS-
If you don't like wasting wood- the picket heads make great little "fish" too!
PPS-
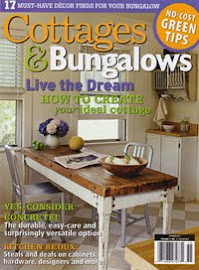
If you happen to find yourself in a bookstore in the near future, check out the latest issue of Cottages & Bungalows magazine. There's an article about our house on pages 40-51. It includes a bunch of new photos of our place, and we're giddy as schoolkids about it, not only because they put together such a sweet article, but because they let us shoot all the photos!
It's our first, real photo credit! Such a trip!
-------------------------------------------------------------------------------------
Want sneak peeks of our projects before we blog about them?
Visit us on Facebook!
-------------------------------------------------------------------------------------
Need help arranging your furniture?
Need design help?
Check out my e-book!


